


Wallpapering, Step by Step
Hanging wallpaper yourself is easier than many people think. Here you'll find everything from preparation to corners, seams, and common mistakes.

reading time
Preparations
Proper preparation makes a bigger difference than many people realize. Make sure the wall is clean, smooth, and free of loose wallpaper residue before you start wallpapering.
What tools are needed for wallpapering?
May need to be supplemented:
- Wallpaper knife/razor blade
- Non-woven wallpaper adhesive
- Wallpaper Tools
- Cellulose Sponge
- Paintbrush
- Roller
Commonly found in the home:
- Pencil
- Bucket of clean water
- Scissors
- Spirit level, laser, or plumb line
- Folding Ruler
- Ladder/step stool
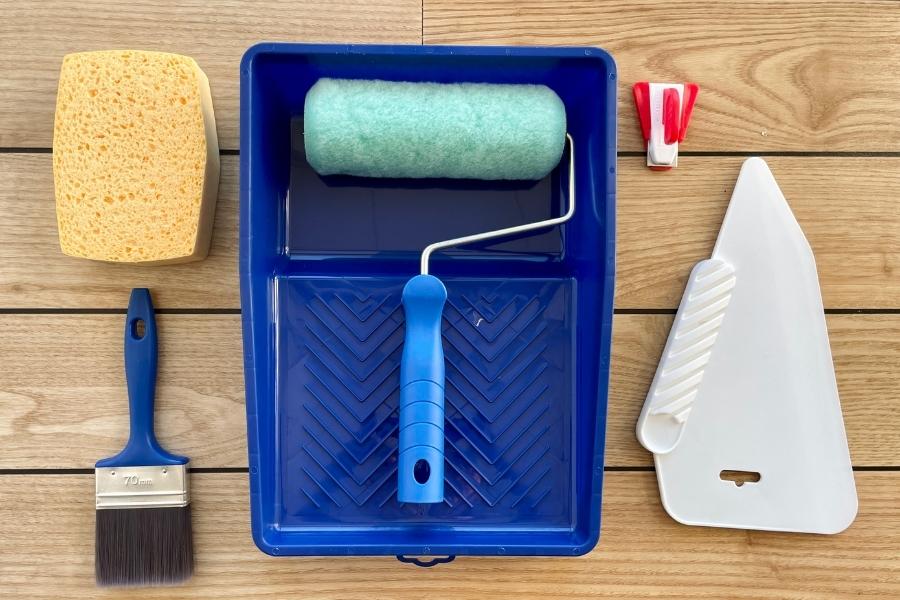
How do you hang wallpaper? You'll find out in this guide. Before you get started, we have a few important tips for those of you who are hanging wallpaper for the first time.
- Take your time and don't stress out
- Vacuum the floors and baseboards
- The glue definitely doesn't dry in 5 seconds
- Wallpaper is more durable than you think
All right! Let's get started.
Hang non-woven wallpaper
1.
Measure out the first strip of wallpaper
We recommend starting at a corner. Measure 51 cm from the corner on the wall and make a light mark with a pencil.
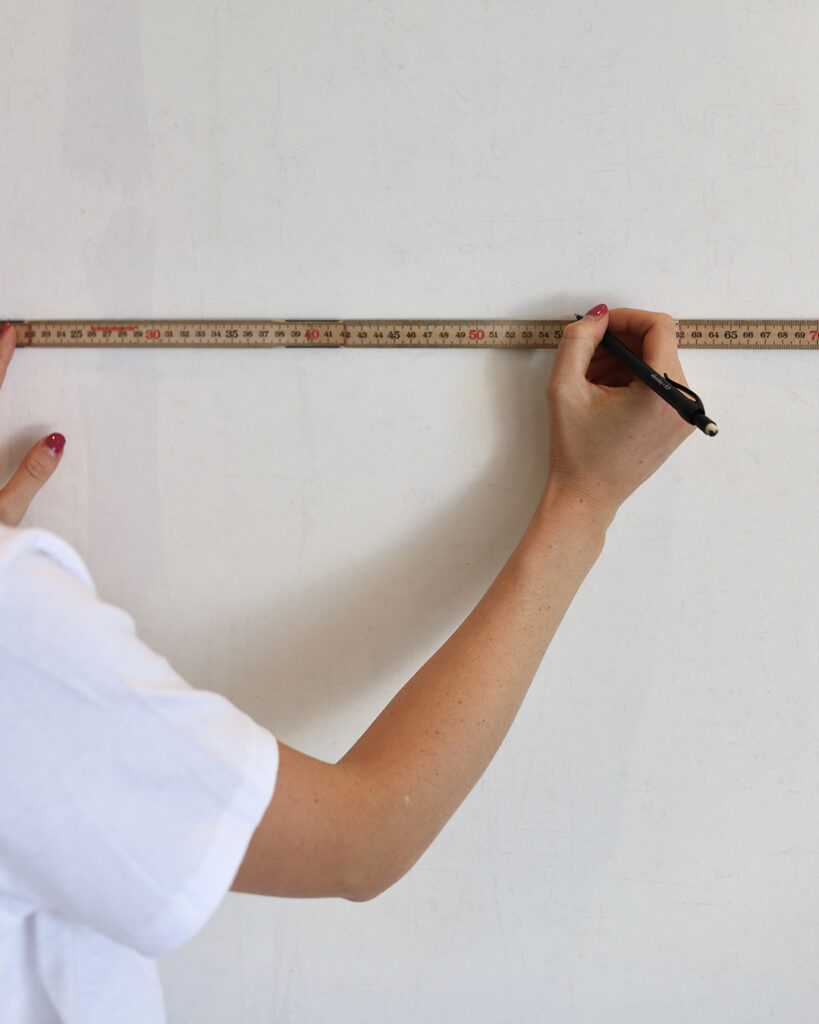
51 cm from the corner

2.
Draw a vertical line
Walls and corners are rarely perfectly straight. That’s no big deal—you can handle it! Draw a thin vertical line (with a pencil) at the 51 cm mark. We recommend using a level (or a laser level). This is the line you’ll follow when hanging the first panel, so you’ll know that the first panel and all subsequent panels are straight.
3.
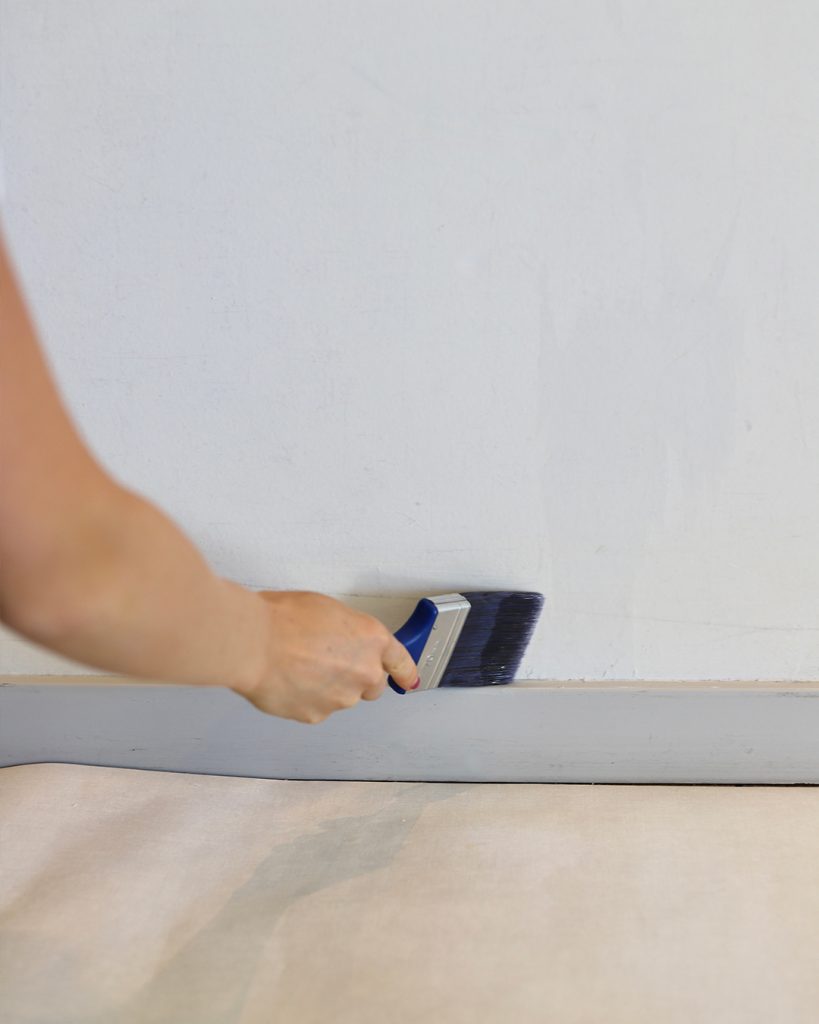
Apply glue to the corners, baseboards, and crown molding
Apply the adhesive with a brush along corners, ceiling moldings, and baseboards for greater precision. It’s okay if you get adhesive on the moldings—it wipes off easily with a damp cellulose sponge once the wallpaper is in place.
Fortunately, the adhesive doesn’t dry in 5 seconds—you have more time than you think. If the adhesive does dry, just brush on more.
4.
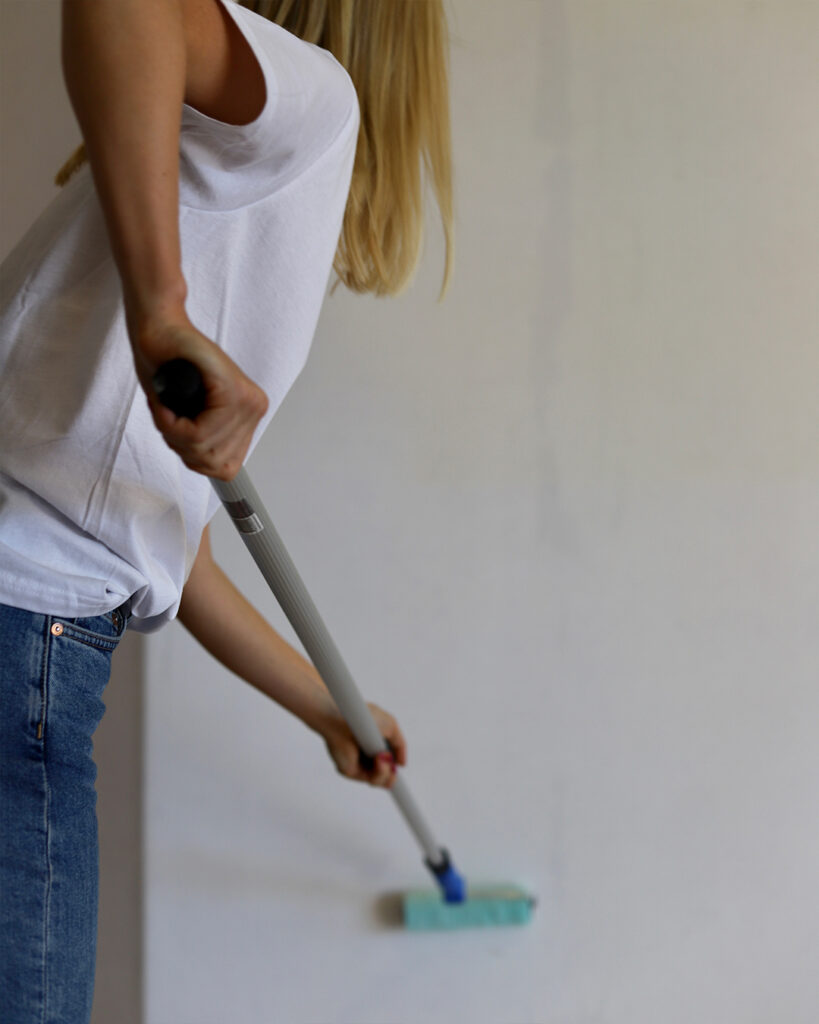
Apply non-woven adhesive to the wall
Use a roller to apply adhesive to the remaining surface. Try to spread the adhesive in an even layer over the surface, and be sure to apply it all the way to the edges.
Apply the adhesive in strips about 1.5 wide at a time—that way, you won’t have to measure or mess around with the adhesive once the strip is on the wall. If you notice that there isn’t enough adhesive in some spots, you can lift the wallpaper and add more where needed.


5.
Hang the first strip of wallpaper on the wall
Place the roll of wallpaper in a cardboard box on the floor; you can also do this without the box if the floor is clean. Unroll the first strip of wallpaper toward the ceiling, making sure to leave a margin of about 5 cm. These extra centimeters against the ceiling will then be trimmed away, giving you a perfect fit against the ceiling. Check that the strip is straight in relation to the marked line. Then press the top part of the strip firmly into place.
6.
Smooth out the wallpaper with the wallpaper tool
Smooth out the wallpaper with the wallpaper tool. Start at the top and work your way out toward the edges. Make sure the seams are secure and that there are no air bubbles.
If air bubbles have formed, see the solution here.


7.
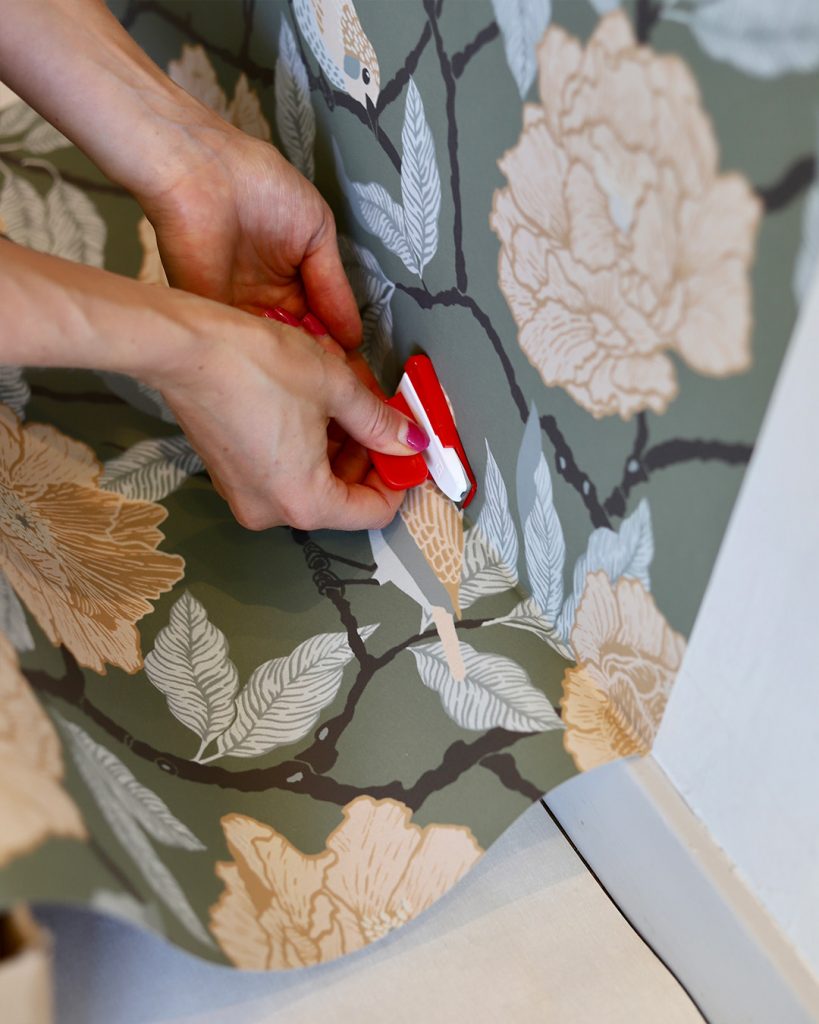
Cut the wallpaper along the baseboards and crown moldings
Cut the wallpaper along the baseboard and crown molding using a wallpaper knife. The bottom edge of the knife should be flush against the wall.
Do you have a ceiling without a molding?
Place the underside of the wallpaper knife against the ceiling and cut off the excess wallpaper.
Make sure the blades are always sharp—otherwise, you might tear the wallpaper. Tip! Flip the razor blade over every one or two strips, depending on the surface.

8.
Wipe away any glue residue
After hanging each strip of wallpaper, wipe away any excess adhesive from the seams and moldings using a lukewarm, damp cellulose sponge.

9.
Get to Know the Pattern Guide
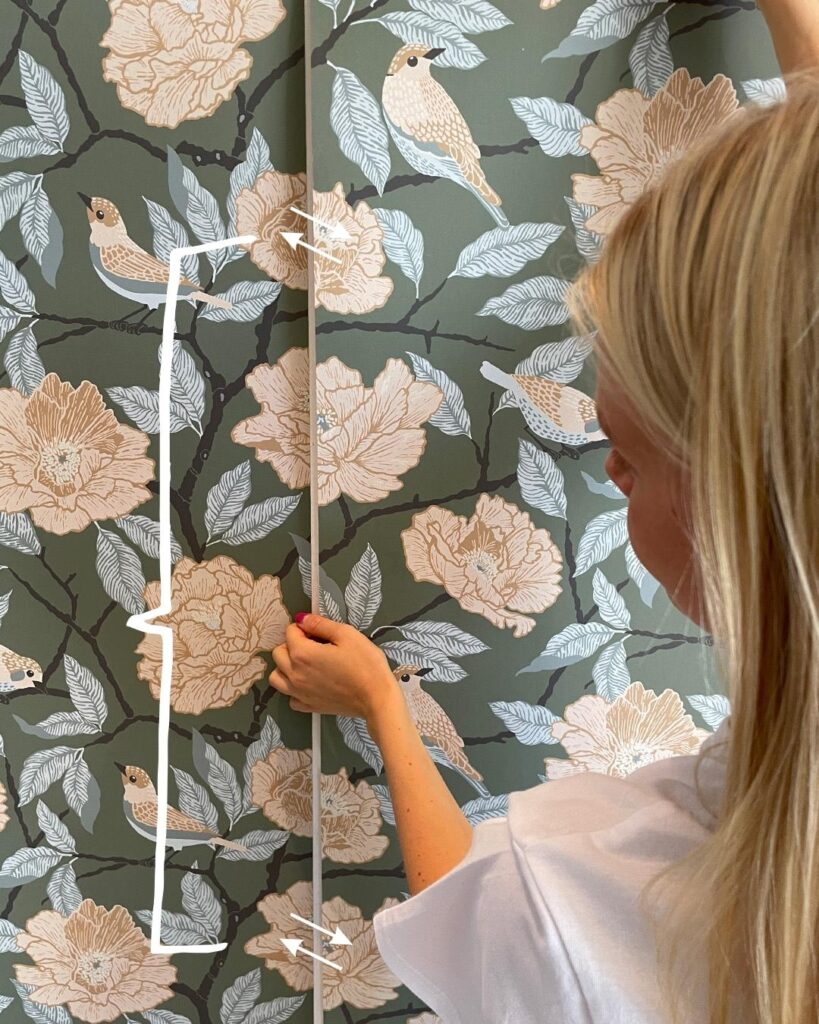
The wallpaper in this example has a pattern repeat offset of 53 cm.
Now you’re going to hang the second strip, and that’s when you’ll need to line up the pattern. A wallpaper pattern is always repeating; in other words, the pattern repeats itself along the entire roll of wallpaper. If the pattern repeat is 53 cm, for example, a certain flower will always reappear every 53 cm. Once you’ve found the pattern repeat in one spot, it will be aligned correctly all the way through. (see image)
Even the sun has its spots—if you notice you've made a mistake, just peel the wallpaper off from the bottom and try again.
Now that you've started wallpapering, repeat steps 2–7 until the room is wallpapered.
FAQ: Wallpapering
Has dirt or air bubbles gotten under the wallpaper?
Peel off the wallpaper and try again. If the glue has started to dry, you can always apply a little more.
Has dirt or air bubbles gotten under the wallpaper?
Peel off the wallpaper and try again. If the glue has started to dry, you can always apply a little more.


Learn how to interpret wallpaper symbols

The latest inwalltreatments for those who want more.